
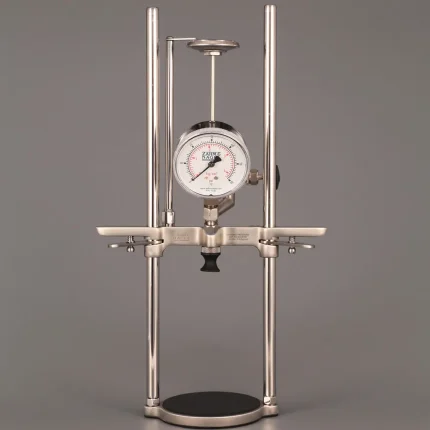

This semi-automated bead depth gauge for beverage and food cans is the industry standard, thanks to its fast and efficient process. Made by our specialist testing brand CMC-KUHNKE, this reliable depth gauge is easy to use and maintain. No change parts are needed.
Offering fast and accurate contact measurement for up to 50 beads, our digital depth caliper is a valuable addition to any beverage or food can testing set up.
Why choose our bead depth caliper
The CMC-KUHNKE Bead Depth Gauge offers several great features and benefits, including:
Automatic data export
Capable of taking hundreds of readings per second, this bead depth gauge saves you time and offers plenty of valuable information. The data can also be automatically exported, so you can easily add it to your QA reporting for food or beverage can testing.
Flexible bead depth measurement
Our digital depth caliper offers accurate and replicable results, so you can check your can beading and seam depth easily. Beading is extremely important in maintaining the integrity of a beverage or food can, as it helps contribute to a longer can life while reducing the use of raw materials. The beads, or ribs, run parallel to each other along the can’s axis, therefore strengthening its overall structure.
The CMC-KUHNKE Bead Depth Gauge is capable of measuring bead depth on a range of different metals and can also be adjusted to allow for a variety of can sizes for the ultimate in flexibility.
What’s more, when you need a seam gauge to ensure that your can seams are deep enough, this handy digital device can help.
How to use the CMC-KUHNKE Bead Depth Gauge
This digital depth caliper for testing can bead depth and seam depth is very easy to use. All you need to do is place the can on the gauge, adjust to suit different can sizes if needed, and hit go. To see how it’s done, check out the short and informative video lower down the page.